
|
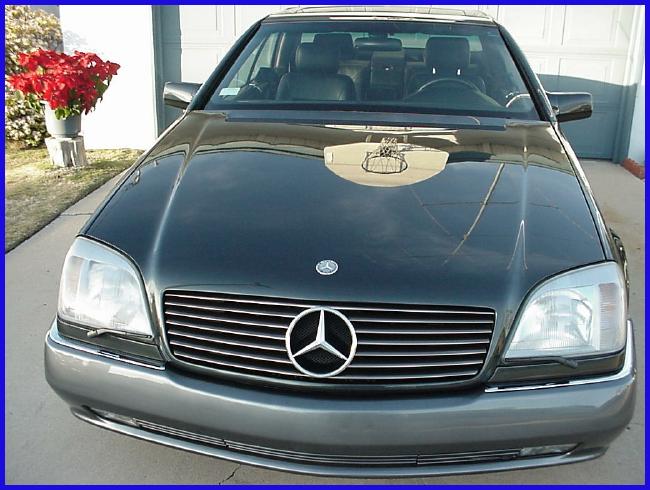
K6JRF's Page formerly W6FZC My Mercedes Benz S500 Coupe |
|
Analyze and Troubleshoot "Check Engine" MIL and Electronic Control Units (ECU)!
|
Seat Belt Extender
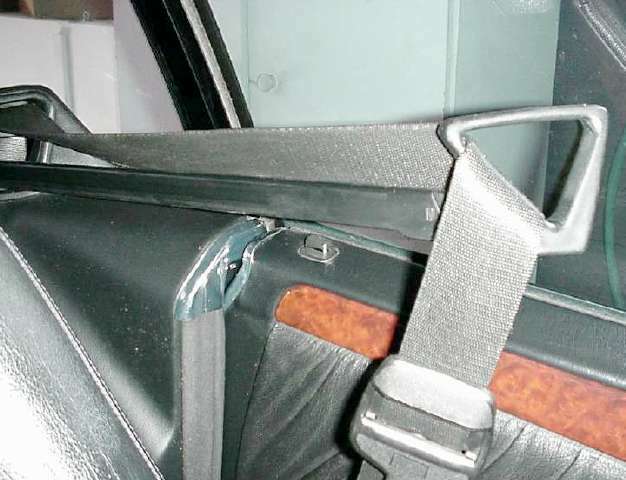
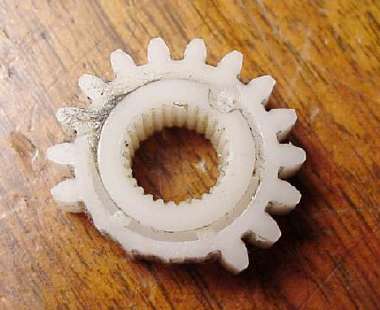
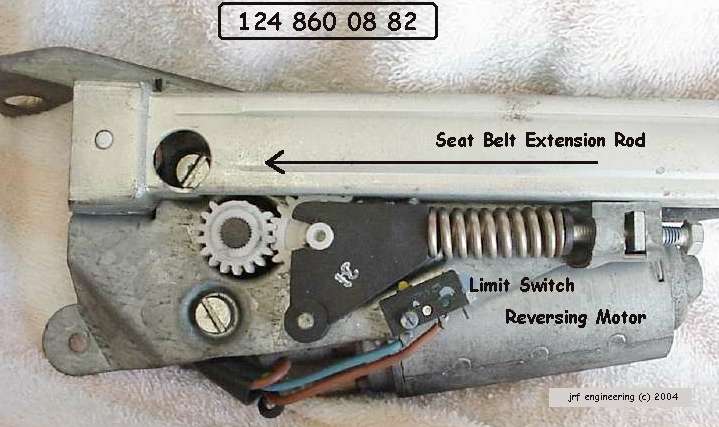
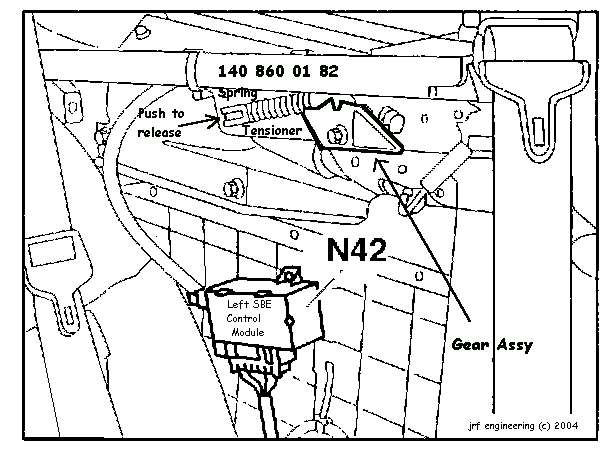
The W140 part number: 140 860 01 82 for the drivers side. The passenger side unit's part number is different. The W124 part number: 124 860 08 82 for the passenger's side. The driver side unit's part number is different. Now the good news! The gears from either can be used in the other unit! So I proceeded to take it apart and remove the two needed gears. After inspecting them closely, I found that the small gear was slightly thicker than needed. Since they are made from nylon, it was a simple matter to sand off the excess to make it fit perfectly. The other problem is that the second gear spindle is a little smaller that the original. There was no solution for this but it didn't retard the operation since the two gears are under tension when assembled. SBE Removal The following disassembly instructions refer to the drivers side. In order to repair the SBE, the rear seat side panel must be removed to gain access to it as the SBE assy is mounted to the car's sidewall for stability. To start, remove the rear driver's side seat bottom. This gains access to the seat back which is held by one bolt (#10). Remove the bolt and lift the rear seat cushion out. Now you can see the complete side panel. On the car's frame at the bottom of the panel, remove the screw that holds it down. Next, with a proper panel puller tool, remove the leather panel cover. It unsnaps easily. Now you will see two (2) screws near the 'handle' that hold the panel to the side frame; remove these and start to work the panel loose. As is the custom with Mercedes, the panel is held by 'clips' on the top side. So you need to gently lift the panel 'up' and out. Once that panel is removed you can now see the SBE unit. Remove the three (3) screws that secure the unit to the side wall of the car and unplug the cable from the electronic control box located just below the SBE on the side wall. You should now have the complete unit ready to 'operate' on your work bench. Bench Repair of SBE With a little inspection, you will see the damaged gear(s). For my unit the smaller gear as shown below, was 'shaved' bald for four (4) teeth.
|
|
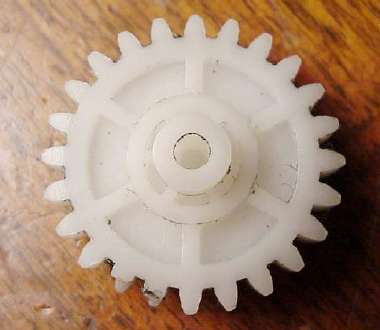
After inspection, the main drive gear had two (2) 'chipped' teeth most likely due to the scraping action that occurred when
the unit reversed itself. I hadn't planned on replacing the second gear but after seeing the two 'chipped' teeth, I
decided that it needed to be replaced since it could catch and cause the same problem to occur. It's a simple matter to remove the parts from the W124 SBE to use in rebuilding the W140 unit. The picture shows a 'recreated' version. On close inspection, you can see that both gears are from my 140 SBE assy. I put them back into the 124 SBE assy for comparison so you can see how they go in.
Update; 8/18/05 Received an email stating that replacement gears are available from George Murphy at Performance Analysis Co. He makes metal replacement gears for these units, a very good ugrade from the plastic ones. Price is about $60. Contact him at 865-482-9175 from 9am to 5pm ET. Click here to email him directly. SRS Light is ON 
When I removed the side panel, the R12/1 squib connector to the Emergency Tensioner Retractor (ETR) was jarred loose. This connector, with red colored end, is not like the typical Mercedes connector in that it does not have 'clips' that lock it into place. It just plugs in and it can be easily jarred loose. When I tested the SBE, the SRS light illuminated and stayed on. After reading the SRS codes (MENU #11), it pointed to the ETR R12/1 squib. Looking at the ETR, the loose connector was spotted. After plugging it in and performing a RESET, the SRS light when out. For the SRS system, you MUST reset the codes since once tripped, only resetting with the proper tool (a scanner) will the SRS light go out. |
|
Send me |